Forensics Fun : YouTube videos from packet captures

Reconstruction of videos from packet captures. How to extract videos from a youtube session and to script the whole thing.

Who says people who look at raw packets cant have fun ? Let’s see how we can reconstruct YouTube videos from raw packets and play them back directly from Unsniff. We also show you a nifty Ruby script to automate this.

Playback

1. Fire up Unsniff Network Analyzer and start a packet capture

2. Go watch some YouTube video(s)  to completion. We will explain how to deal with half played videos later.

3. Once you are done,  switch over to the User Objects tab where all the action is. You will see a list of “user objects” extracted by Unsniff from the stream. Click on the Type column to sort by Type and locate the FLV objects. Right click to Save or Play (To playback you need the free VLC Player installed and FLV files associated with VLC).
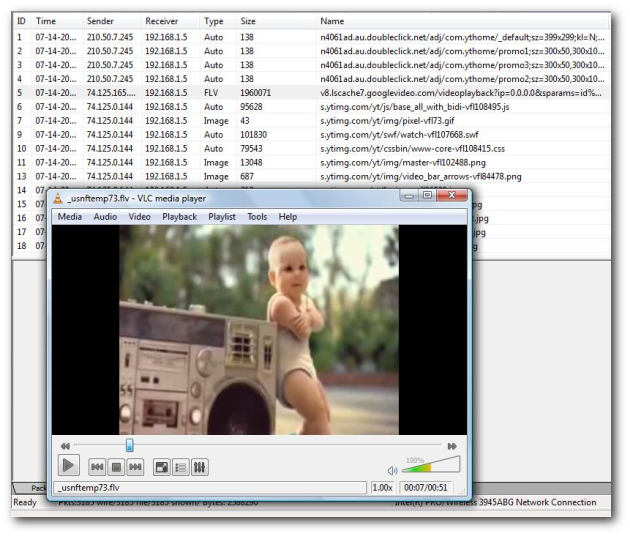
Right click the user object of type FLV and select Play or Save

Feeling adventurous ?  Lets try some more tricks.

Pruning the packet capture

When you interact with a site like YouTube there is a ton of content exchanged, not all of it is the video bits. You have packets containing images, HTML, Flash, and Javascript. The actual FLV is exchanged in a single TCP stream. If you can save these streams alone, you will be able to reconstruct the videos.

Here is how you do it.

1. Switch over to the “Sessions”, here is where you will see a list of TCP sessions updated in real time (every packet).

Only the TCP Stream containing the media is required ! Cut and paste it

2. Locate the TCP Stream carrying FLV traffic. These are typically the really large ones. Select the stream, copy the stream (Edit->Copy) and Paste it as a new file (Edit -> Paste as New). Voila ! Switch to the User Objects in the new file and you will find the FLV without all the other clutter.

Script the whole thing using Ruby

The right clicking novelty quickly wears out after a while. You really want to automate this type of forensic stuff.

Here is a sample which shows you how you can use Ruby to script this stuff.

Task : Extract all the videos in a capture file as separate playable files. (including the ones that were aborted in the middle due to the use losing interest)

1. Save the capture as USNF format (this is the scriptable format used by Unsniff).

2. Run this script like so

We are still working on tweaking the experience for our upcoming Unsniff 2.0 release. In the meantime, we invite you to  try out the Unsniff Beta 1.8 and give us feedback on what you’d like to really see.

Resolving SNMP OIDs in packet captures

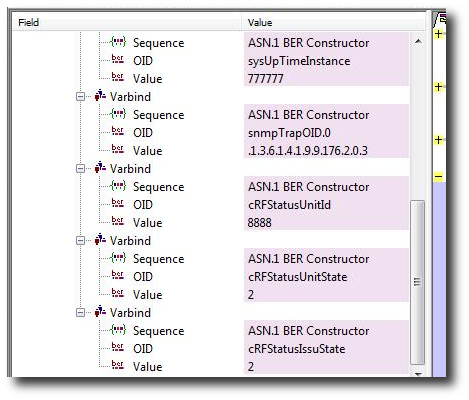
How to convert SNMP OIDs in packet captures to human readable names ?

A common problem while analyzing SNMP traffic is resolving OIDs to names.

We don’t want to see this :

Showing raw SNMP OIDs in the packet list

We want to see this :

Showing human readable names in the packet list

The venerable Wireshark‘s own resolution capabilities work fine for many simple cases. With Wireshark, you can list the modules you need and have it load them upon startup. But what if you want to load thousands of MIBs ? What if you want to deal with badly written MIBs, MIBs with incorrect module names, MIBs with dependencies ?  We might be able to help you.

We make two products, Unbrowse SNMP and Unsniff Network Analyzer. Unbrowse SNMP is a full fledged SNMP tool that can compile almost anything you throw at it. It then persists the properties of each OID in a very efficient format on disk. The Unbrowse Scripting API provides a number of ways to get at this data. The other product, Unsniff is the actual SNMP packet analyzer. We have integrated both these products in such a way that Unsniff will use the OID information already available via Unbrowse.

To use this feature : (Requires latest versions of Unbrowse SNMP and Unsniff Network Analyzer)

  1. Download and Install Unbrowse SNMP
  2. Press Crtl+M and select all the MIB files you want to add
  3. Alternately, Download a precompiled package (we have one containing all the Cisco MIBs)
  4. Done

Unsniff will automatically detect if the Unbrowse SNMP name resolution facility is installed and will then proceed to resolve all OIDs to the maximum extent it can.

Resolving OIDs where ever they are found

The advantages :

  • Leverage Unbrowse SNMP’s very flexible compiler
  • OIDs of thousands of modules are instantly available for resolution
  • Has no impact on Unsniff’s startup time
  • High speed resolution with low memory overhead
  • Scriptable via Ruby

MIB Packages updated

A new version of the Cisco MIB Package is now available for download. This monster package contains all the latest MIBs published by Cisco on its web site at http://www.cisco.com/public/sw-center/netmgmt/cmtk/mibs.shtml as of April 2 2009.

Modules : 1137 Objects : 72,000+

Get it from here  (Click on the first item. Download size = 35.1 MB)

NOTE : The MIB Package takes less than 5 minutes to install on Windows XP and about 15 minutes on Windows Vista (dont ask why !) Users of Vista please be patient while the package is installed.

What is MIB Package ?

It is a ZIP file specially created for use with Unbrowse SNMP. You can install the package by selected Repository -> Import Package from the menu.

What is  Unbrowse SNMP ?

It is a easy to use SNMP utility which allows you to easily perform all SNMP operations in a rich graphical environment. Read here for features and screenshots. It is free for basic use but some premium feature require a license after 30 days.